Guides on creating Gmail account.

Introduction
Setting up a Gmail account is easy. You will begin by creating a Google account, and during the quick sign-up process you will choose your Gmail account name. In this lesson, we'll show you how to set up your Google account for Gmail, add and edit contacts, and edit your mail settings.
Setting up a Gmail account
To create a Gmail address, you'll first need to create a Google account. Gmail will redirect you to the Google account sign-up page. You'll need to provide some basic information like your name, birth date, gender, and location. You will also need to choose a name for your new Gmail address. Once you create an account, you'll be able to start adding contacts and adjusting your mail settings.
To create an account:
- Go to www.gmail.com.
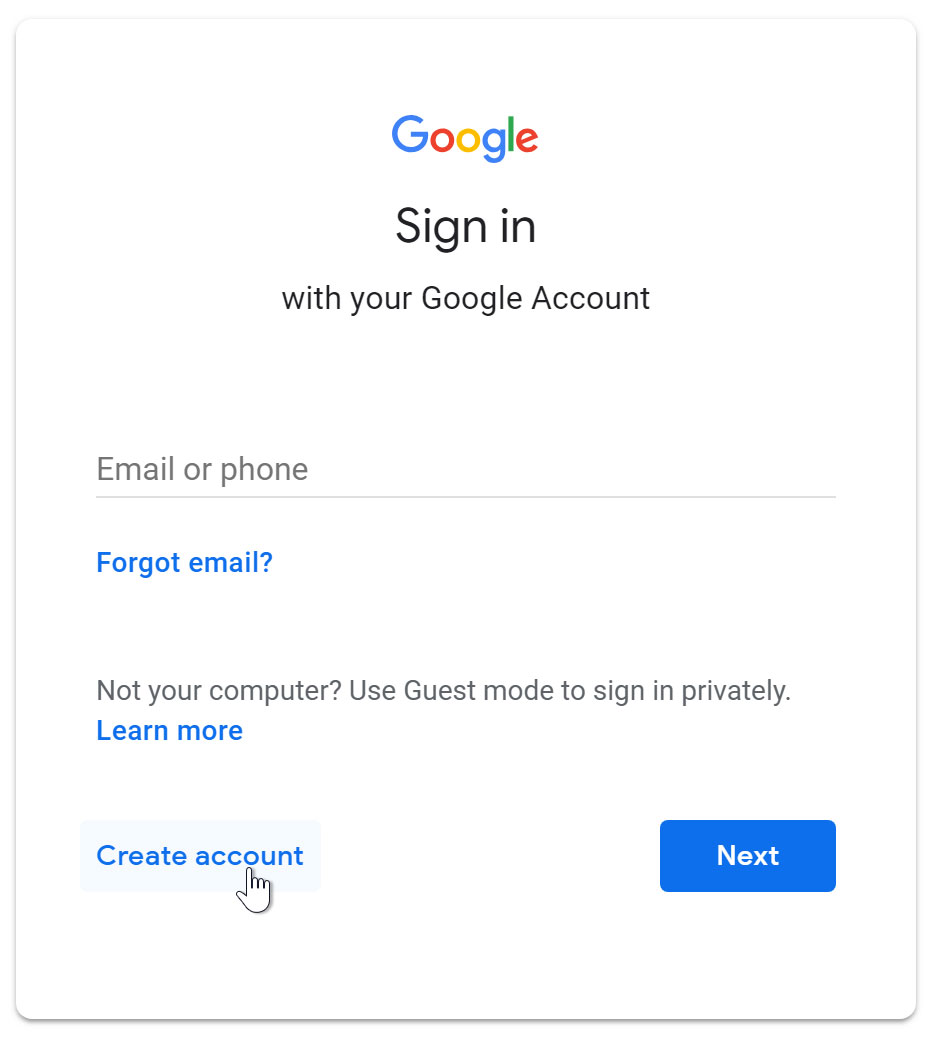
- Click Create account.
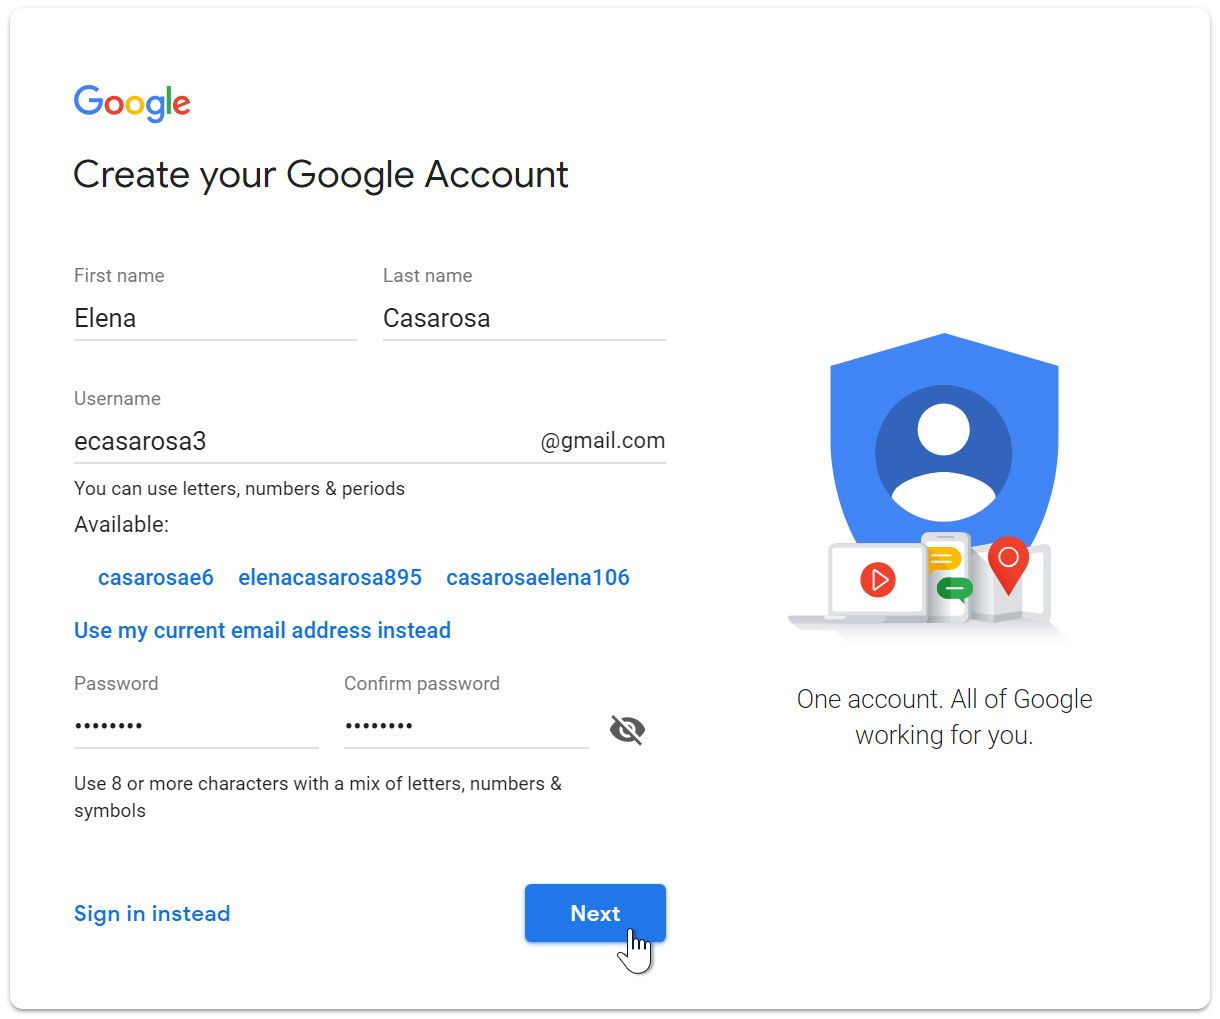
- The sign-up form will appear. Follow the directions by entering the required information.
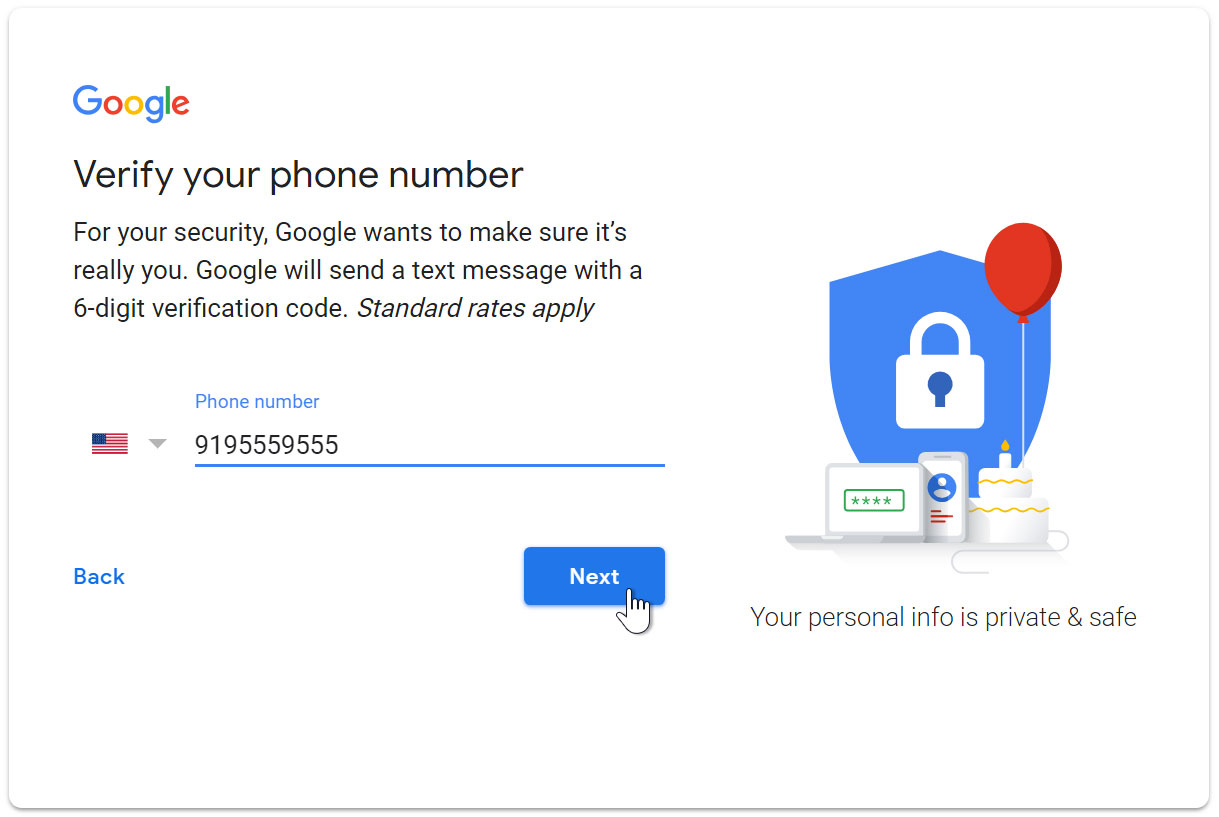
- Next, enter your phone number to verify your account. Google uses a two-step verification process for your security.
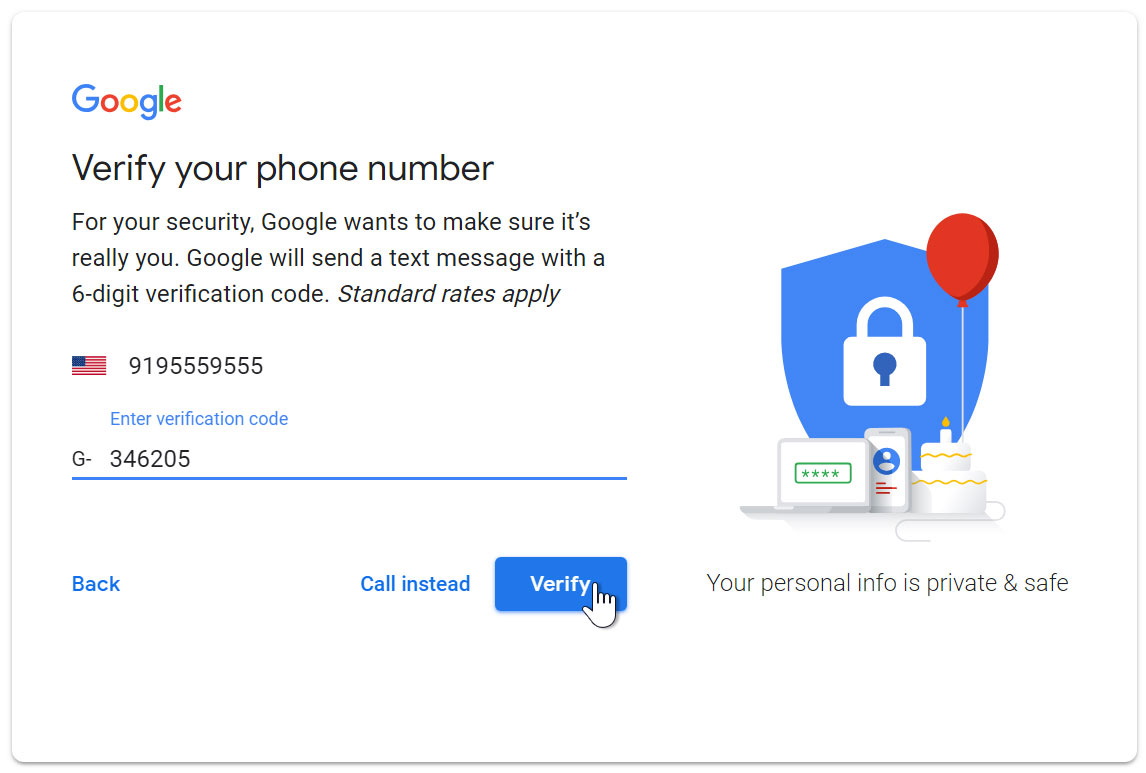
- You will receive a text message from Google with a verification code. Enter the code to complete the account verification.
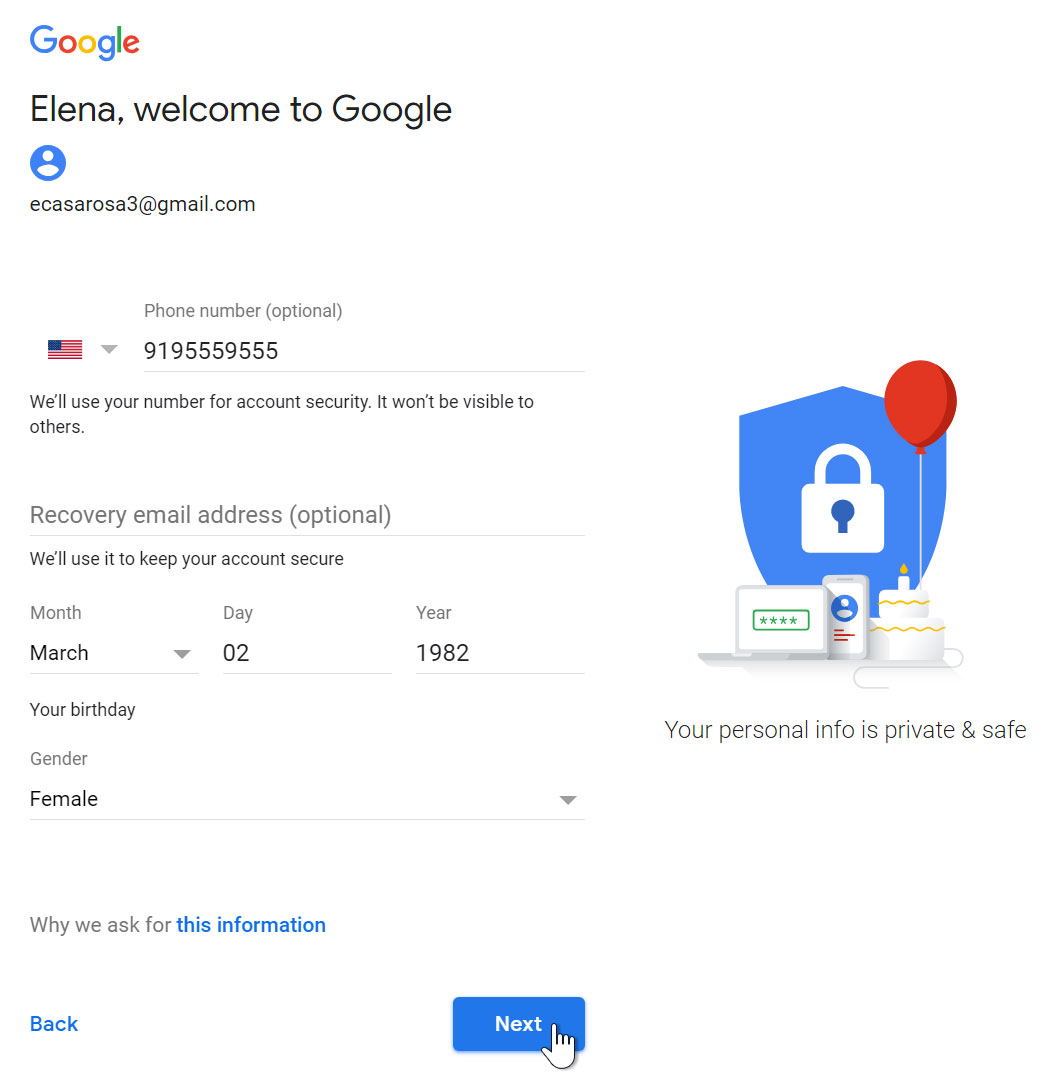
- Next, you will see a form to enter some of your personal information, like your name and birthday.
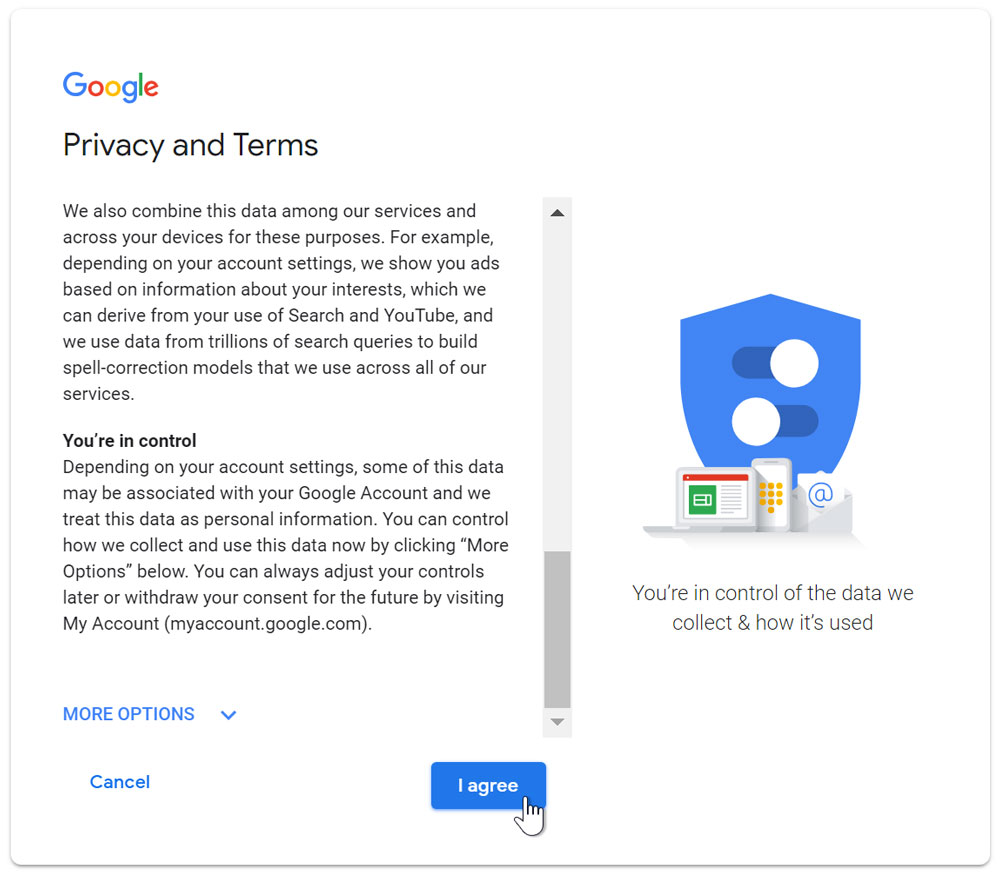
- Review Google's Terms of Service and Privacy Policy, then click I agree.
- Your account will be created.
Just like with any online service, it's important to choose a strong password—in other words, one that is difficult for someone else to guess. For more information, review our lesson on creating strong passwords.
Signing in to your account
When you first create your account, you will be automatically signed in. Most of the time, however, you'll need to sign in to your account and sign out when you're done with it. Signing out is especially important if you're using a shared computer (for example, at a library or office) because it prevents others from viewing your emails.
To sign in:
- Go to www.gmail.com.
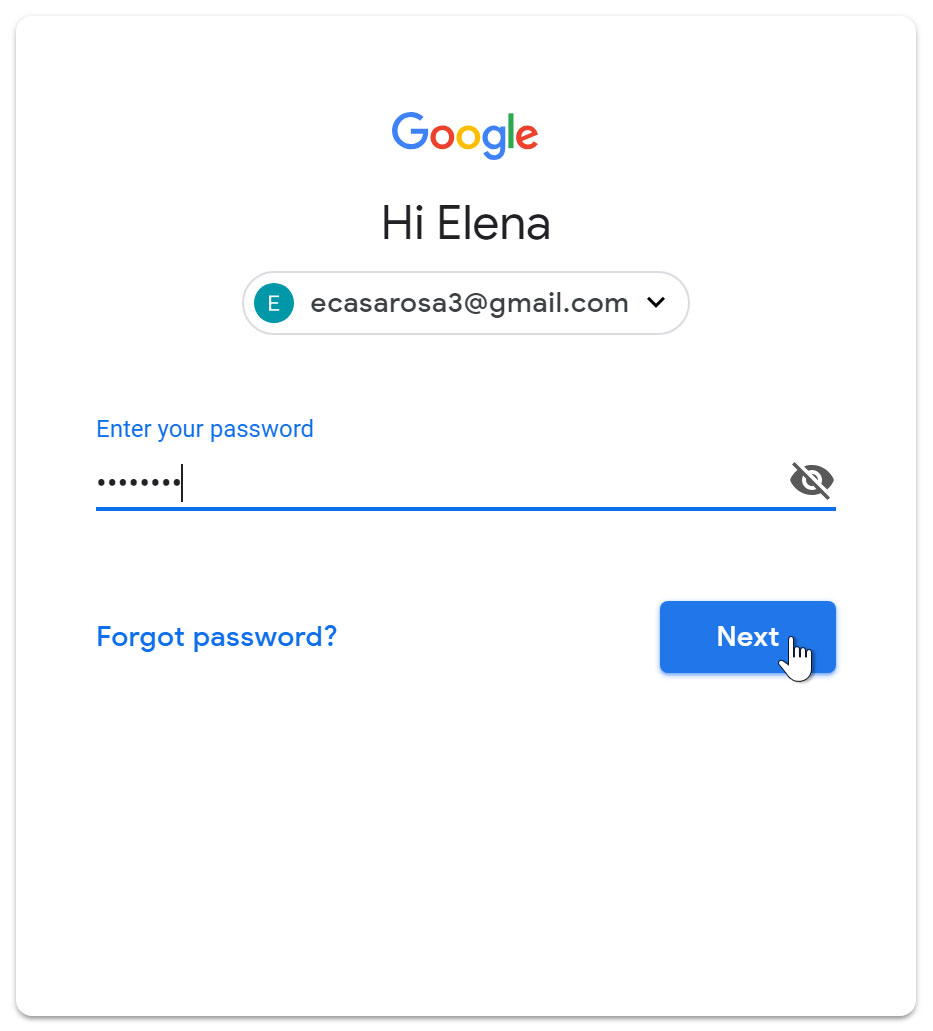
- Type your user name(your email address) and password, then click Next.
To sign out:
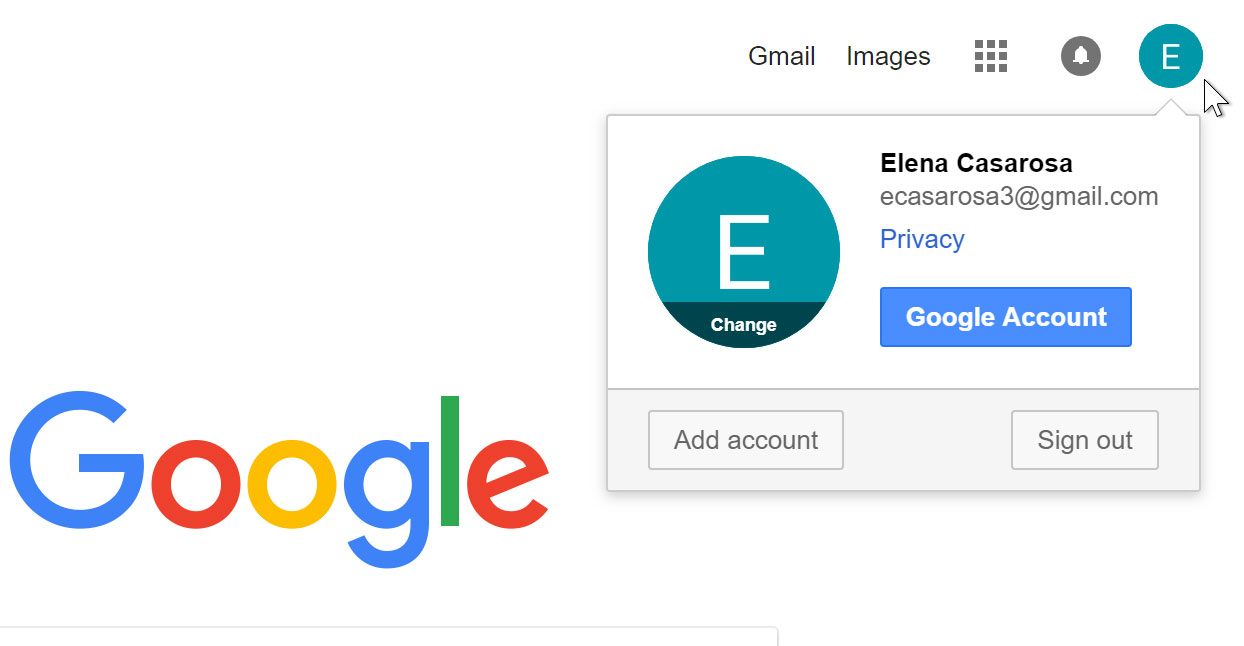
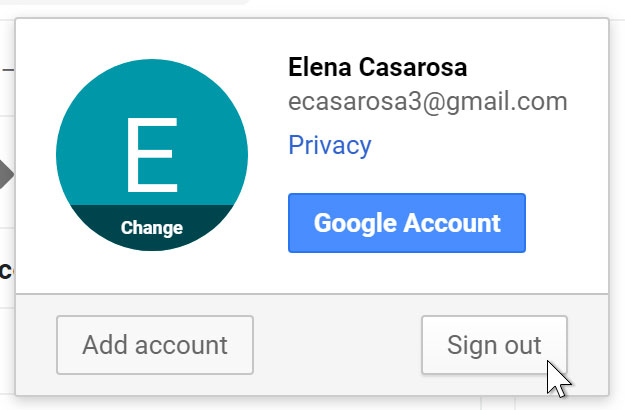
In the top-right corner of the page, locate the circle that has your first initial (if you've already selected an avatar image, it will show the image instead). To sign out, click the circle and select Sign out.
Mail settings
Occasionally, you may want to make adjustments to Gmail's appearanceor behavior. For example, you could create a signature or vacation reply, edit your labels, or change the theme. These adjustments can be made from your mail settings.
To access your mail settings:
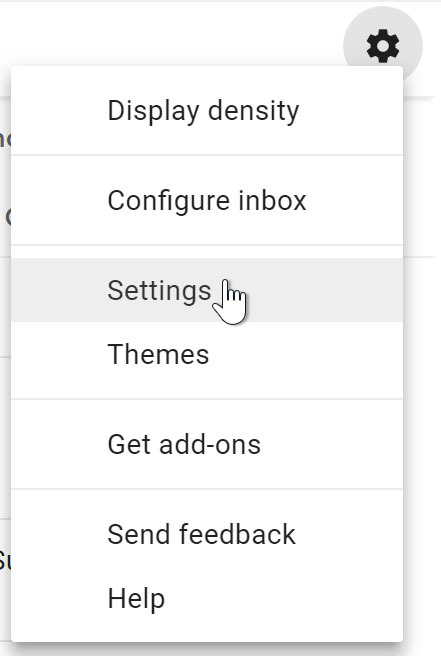
- Click the gear icon in the top-right corner of the page, then select Settings.
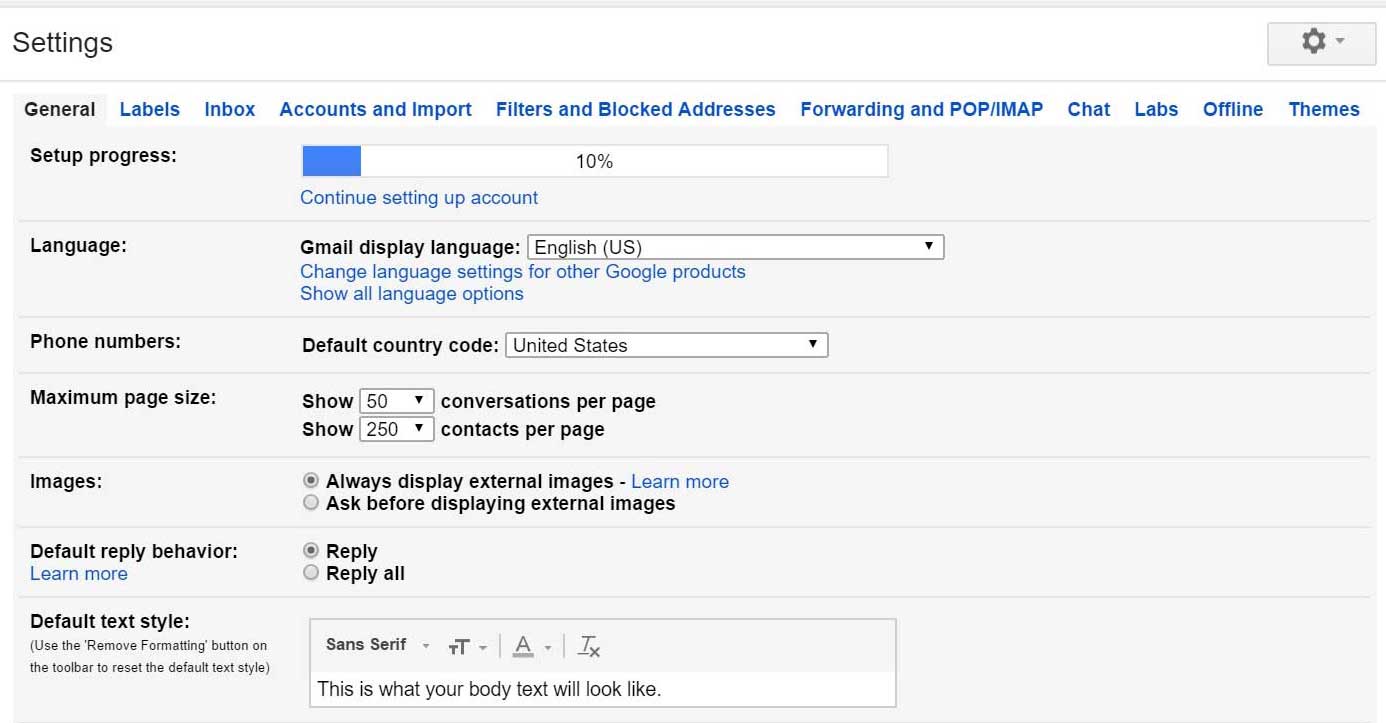
- From here, you can click any of the categories at the top to edit the desired settings.
Adding contacts
Like all major email providers, Gmail lets you keep an address book of contacts so you don't have to memorize everyone's email addresses. You can also add other contact information, like phone numbers, birthdays, and physical addresses.
To add a contact:
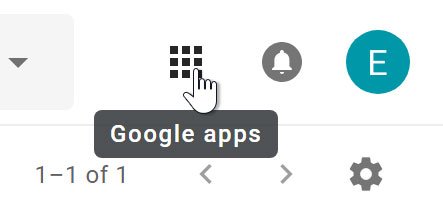
- Click the Google appsbutton.
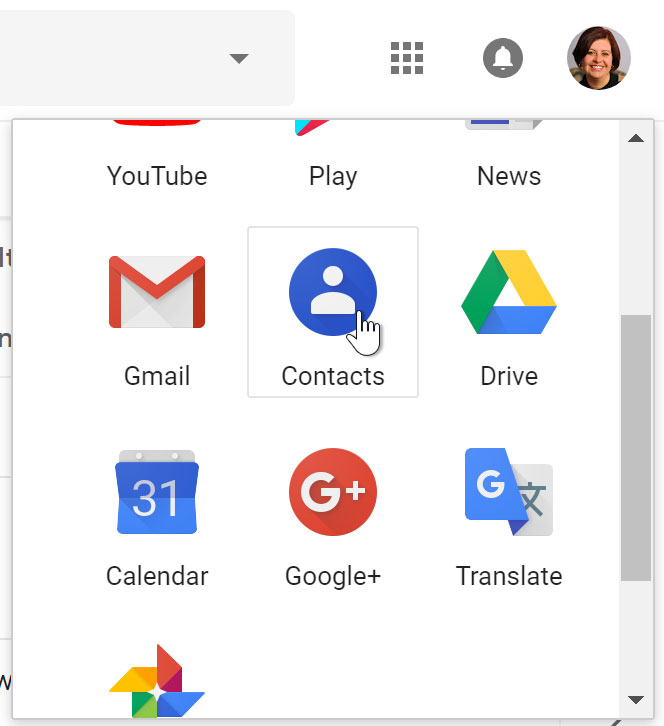
- Click the Contactsbutton in the drop-down menu.
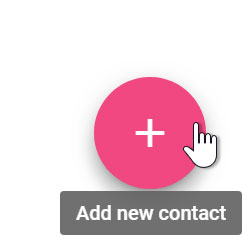
- Your contacts screen will appear. Click the Add new contact button in the lower-right corner.
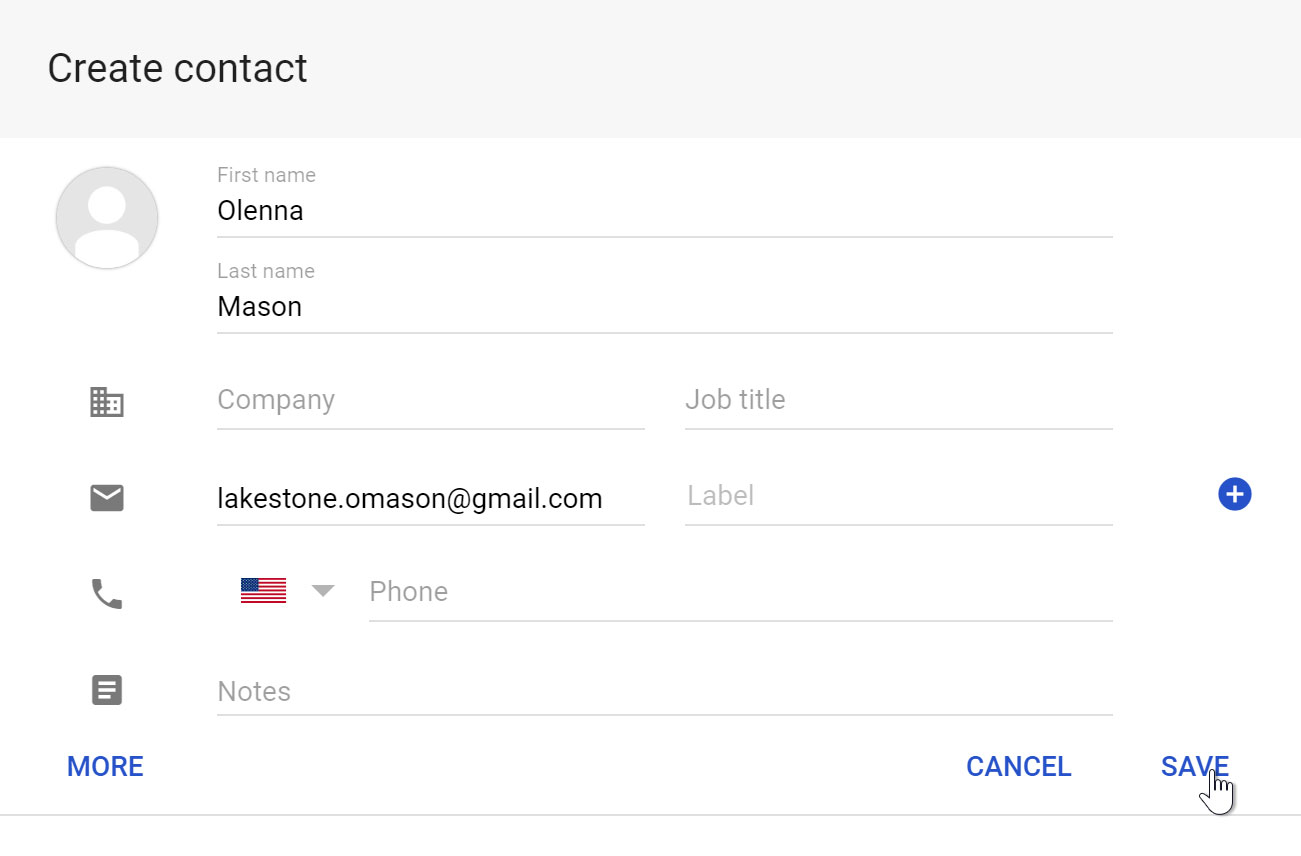
- Enter the contact information, then click Save.
To edit a contact:
- In the Google apps drop-down menu, select Contacts.
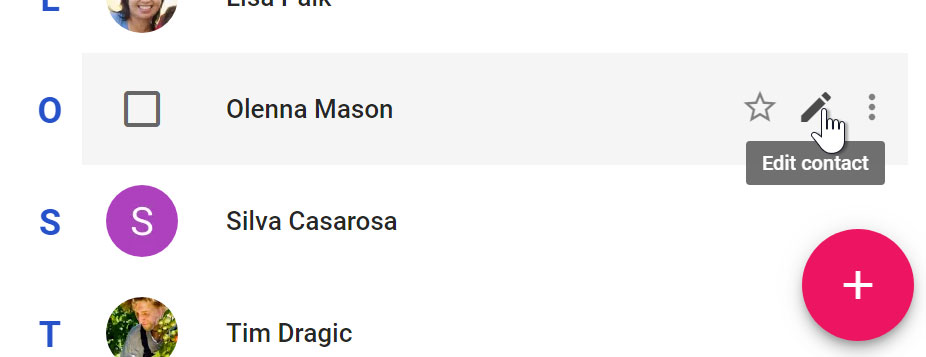
- Locate the contact you want to edit, then click Edit Contact.
- You can now make any changes you want to the contact.
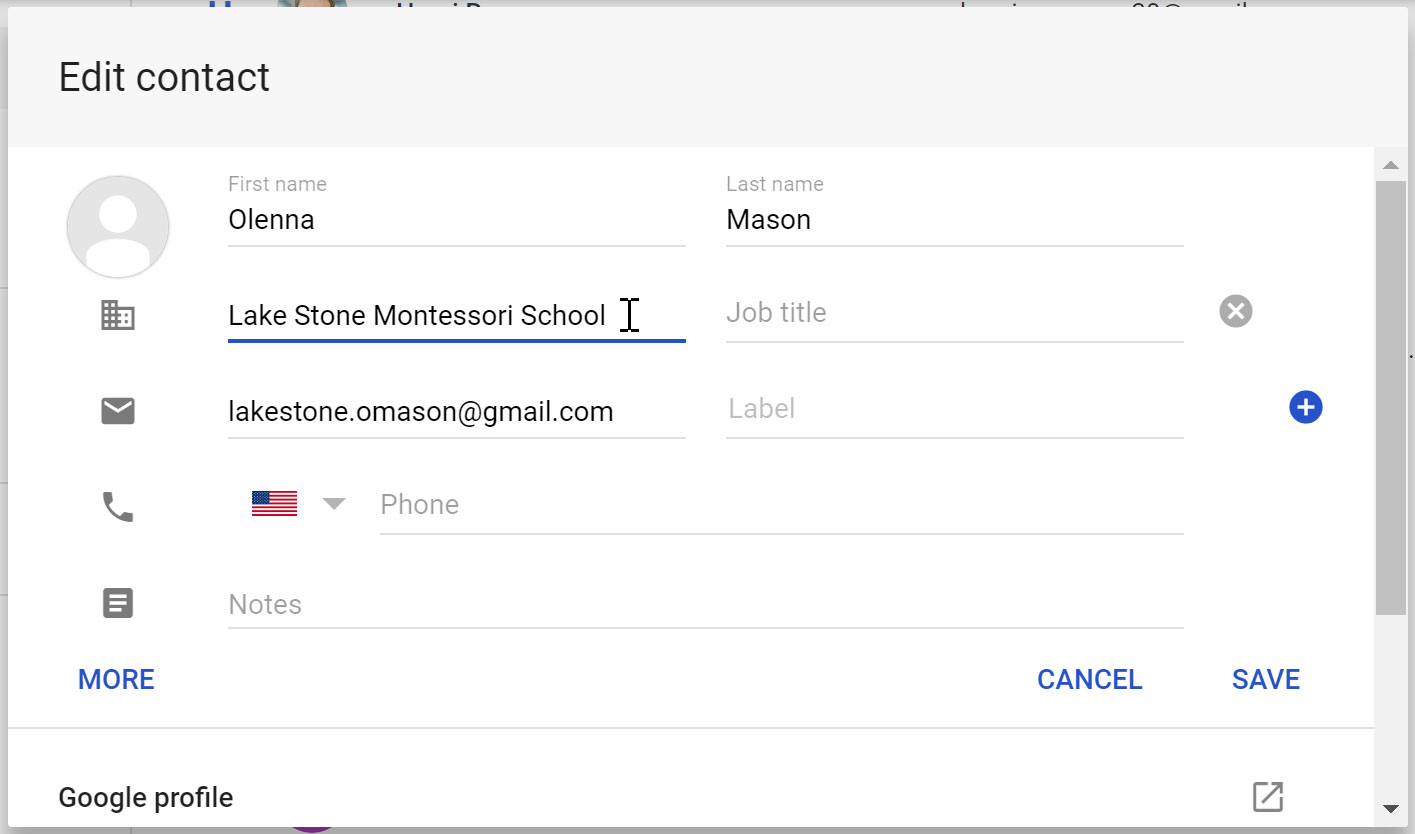
By default, when you send an email to a new address, Gmail adds the address to your contacts. You can then go to your contacts to edit the person's information as needed.
Importing mail and contacts
You may already have a contact list from another email address, and it would be a lot of work to re-enter all of this information manually. Gmail allows you to import your contacts from another email account, and you can even import all of your email messages from that account. Several email providers are supported, including Yahoo!, Hotmail, and AOL.
To add other accounts:
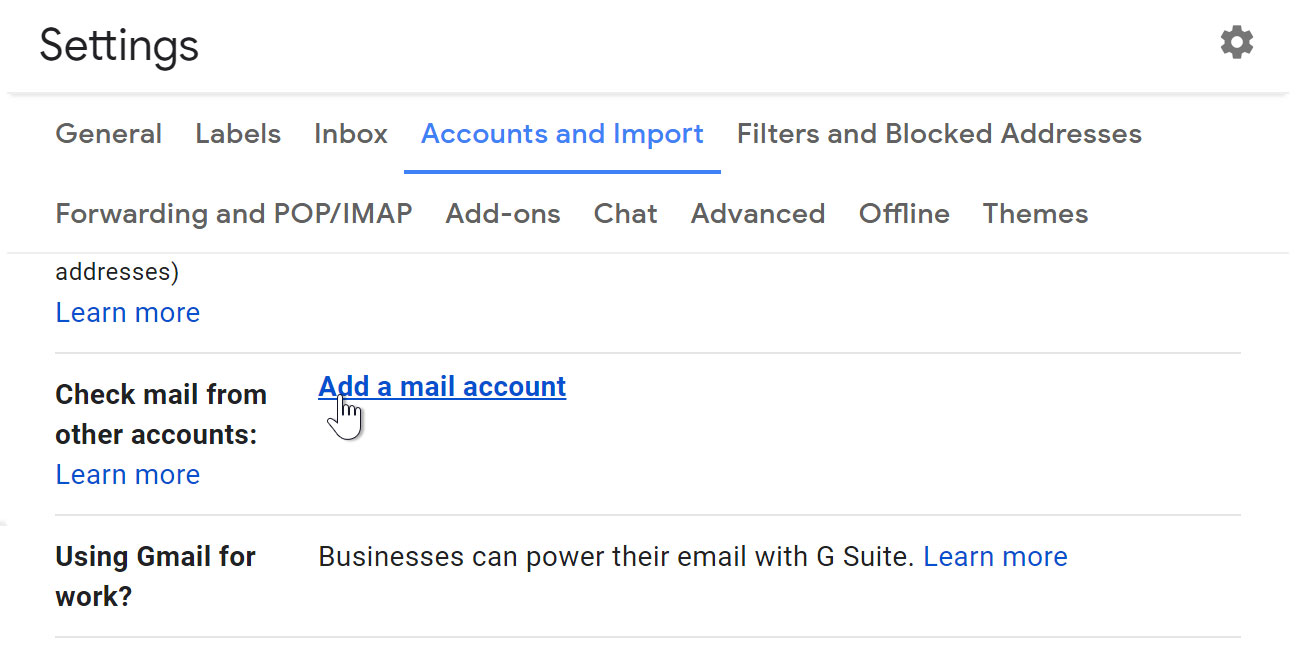
- Click the gear icon in the top-right corner of the page, then select Settings.
- Go to Accounts and clickAdd a mail account. You can then follow the instructions on the screen to import your mail.
Introduction
Setting up a Gmail account is easy. You will begin by creating a Google account, and during the quick sign-up process you will choose your Gmail account name. In this lesson, we'll show you how to set up your Google account for Gmail, add and edit contacts, and edit your mail settings.
Setting up a Gmail account
To create a Gmail address, you'll first need to create a Google account. Gmail will redirect you to the Google account sign-up page. You'll need to provide some basic information like your name, birth date, gender, and location. You will also need to choose a name for your new Gmail address. Once you create an account, you'll be able to start adding contacts and adjusting your mail settings.
To create an account:
- Go to www.gmail.com.
- Click Create account.
- The sign-up form will appear. Follow the directions by entering the required information.
- Next, enter your phone number to verify your account. Google uses a two-step verification process for your security.
- You will receive a text message from Google with a verification code. Enter the code to complete the account verification.
- Next, you will see a form to enter some of your personal information, like your name and birthday.
- Review Google's Terms of Service and Privacy Policy, then click I agree.
- Your account will be created.
Just like with any online service, it's important to choose a strong password—in other words, one that is difficult for someone else to guess. For more information, review our lesson on creating strong passwords.
Signing in to your account
When you first create your account, you will be automatically signed in. Most of the time, however, you'll need to sign in to your account and sign out when you're done with it. Signing out is especially important if you're using a shared computer (for example, at a library or office) because it prevents others from viewing your emails.
To sign in:
- Go to www.gmail.com.
- Type your user name(your email address) and password, then click Next.
To sign out:
In the top-right corner of the page, locate the circle that has your first initial (if you've already selected an avatar image, it will show the image instead). To sign out, click the circle and select Sign out.
Mail settings
Occasionally, you may want to make adjustments to Gmail's appearanceor behavior. For example, you could create a signature or vacation reply, edit your labels, or change the theme. These adjustments can be made from your mail settings.
To access your mail settings:
- Click the gear icon in the top-right corner of the page, then select Settings.
- From here, you can click any of the categories at the top to edit the desired settings.
Adding contacts
Like all major email providers, Gmail lets you keep an address book of contacts so you don't have to memorize everyone's email addresses. You can also add other contact information, like phone numbers, birthdays, and physical addresses.
To add a contact:
- Click the Google appsbutton.
- Click the Contactsbutton in the drop-down menu.
- Your contacts screen will appear. Click the Add new contact button in the lower-right corner.
- Enter the contact information, then click Save.
To edit a contact:
- In the Google apps drop-down menu, select Contacts.
- Locate the contact you want to edit, then click Edit Contact.
- You can now make any changes you want to the contact.
By default, when you send an email to a new address, Gmail adds the address to your contacts. You can then go to your contacts to edit the person's information as needed.
Importing mail and contacts
You may already have a contact list from another email address, and it would be a lot of work to re-enter all of this information manually. Gmail allows you to import your contacts from another email account, and you can even import all of your email messages from that account. Several email providers are supported, including Yahoo!, Hotmail, and AOL.
To add other accounts:
- Click the gear icon in the top-right corner of the page, then select Settings.
- Go to Accounts and clickAdd a mail account. You can then follow the instructions on the screen to import your mail.
Comments
Post a Comment